# Quick Start Guide
Strapi offers a lot of flexibility. Whether you want to go fast and quickly see the final result, or would rather dive deeper into the product, we got you covered.
PREREQUISITES
Make sure Node.js and npm are properly installed on your machine. It is also possible to use Yarn instead of npm (see install the Yarn package (opens new window)).
рҹ‘Ү Let's get started! Using the big buttons below, please choose between:
- the Hands-on path for a DIY approach to run your project
- or the Starters path for the quickest way to spin up a fullstack application powered by a Strapi back end.
# рҹҡҖ Part A: Create a new project with Strapi
# Step 1: Run the installation script
Run the following command in a terminal:
# Step 2: Register the first administrator user
Once the installation is complete, your browser automatically opens a new tab.
By completing the form, you create your own account. Once done, you become the first administator user of this Strapi application. Welcome aboard, commander!
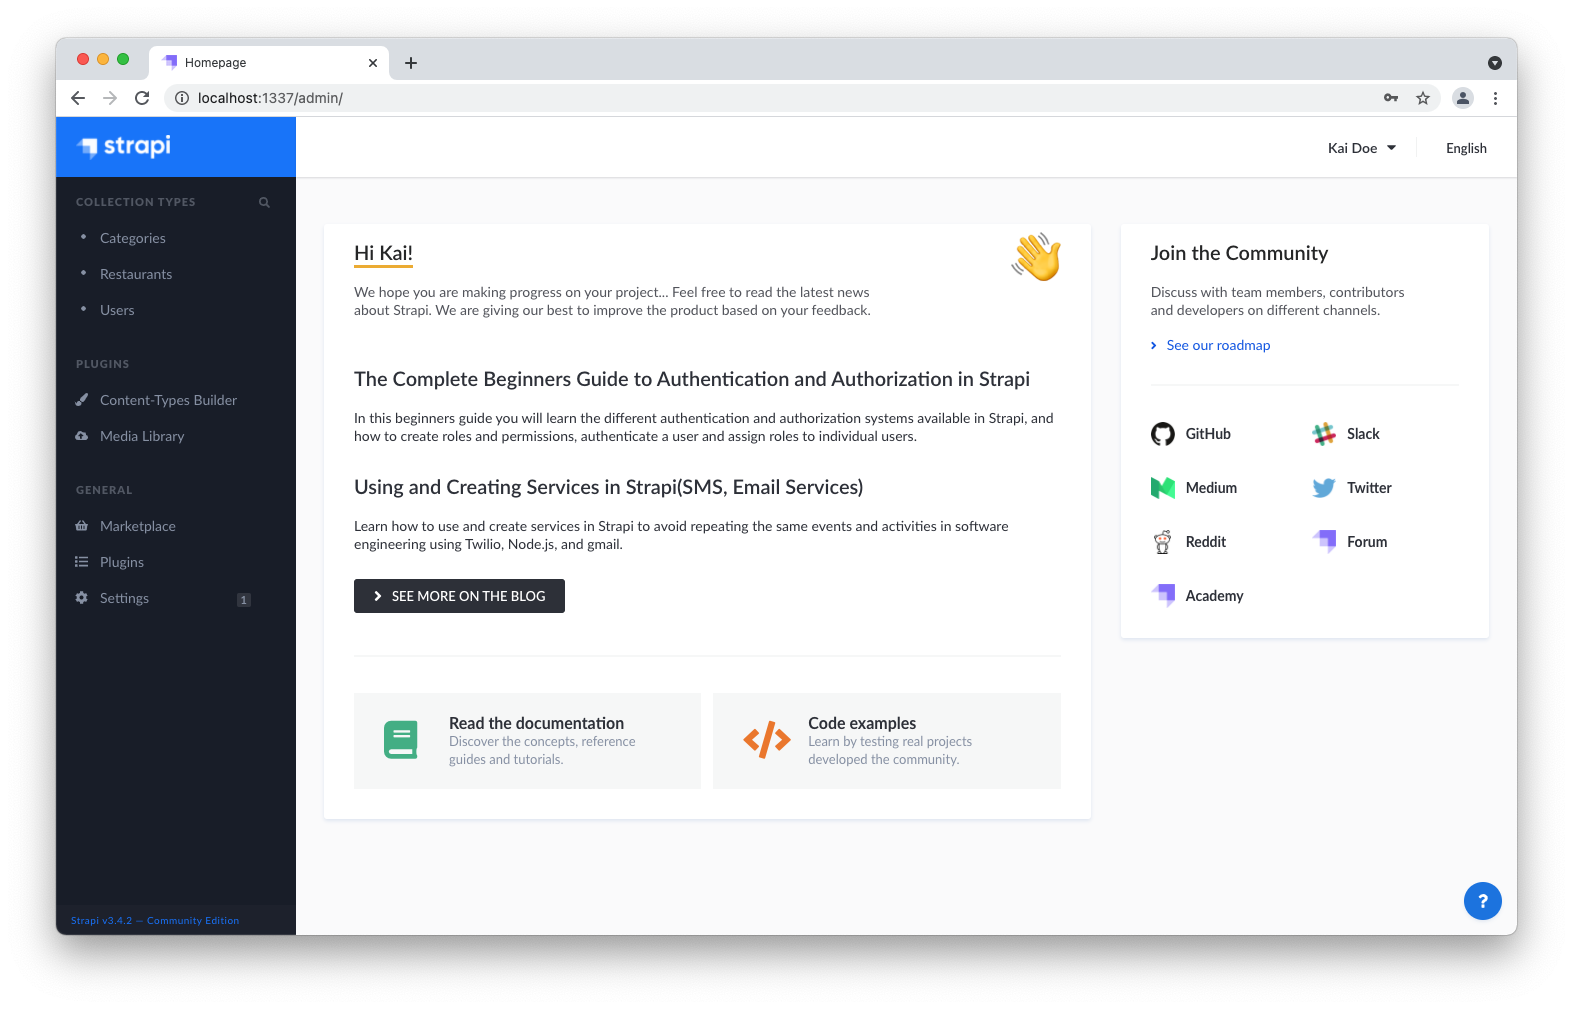
You now have access to the admin panel (opens new window):
рҹҘі CONGRATULATIONS!
You have just created a new Strapi project! You can start playing with Strapi and discover the product by yourself using our User Guide, or proceed to part B below.
# рҹӣ Part B: Build your content
The installation script has just created an empty project. We will now guide you through creating a restaurants directory, inspired by our FoodAdvisor (opens new window) example application.
In short, we will create a data structure for your content, then add some entries and publish them, so that the API for your content can be consumed.
The admin panel of Strapi runs at http://localhost:1337/admin (opens new window). This is where you will spend most of your time creating and updating content.
рҹ’Ў TIP
If the server is not already running, in your terminal, cd into the my-project folder and run npm run develop (or yarn develop) to launch it.
# Step 1: Create collection types with the Content-Types Builder
The Content-Types Builder plugin helps you create your data structure. When creating an empty project with Strapi, this is where to get the party started!
# Create a "Restaurant" collection type
Your restaurants directory will eventually include many restaurants, so we need to create a "Restaurant" collection type. Then we can describe the fields to display when adding a new restaurant entry:
- Go to Plugins > Content-Types Builder (opens new window) in the main navigation.
- Click on Create new collection type.
- Type
restaurantfor the Display name, and click Continue. - Click the Text field.
- Type
namein the Name field. - Switch to the Advanced Settings tab, and check the Required field and the Unique field settings.
- Click on Add another Field.
- Choose the Rich Text field.
- Type
descriptionunder the Name field, then click Finish. - Finally, click Save and wait for Strapi to restart.

Once Strapi has restarted, "Restaurants" is listed under Collection Types in the main navigation. Wow, you have just created your very first content type! It was so cool вҖ” let's create another one right now, just for pleasure.
# Create a "Category" collection type
It would help getting a bit more organized if our restaurants directory had some categories. Let's create a "Category" collection type:
- Go to Plugins > Content-Types Builder (opens new window) in the main navigation.
- Click on Create new collection type.
- Type
categoryfor the Display name, and click Continue. - Click the Text field.
- Type
namein the Name field. - Switch to the Advanced Settings tab, and check the Required field and the Unique field settings.
- Click on Add another Field.
- Choose the Relation field.
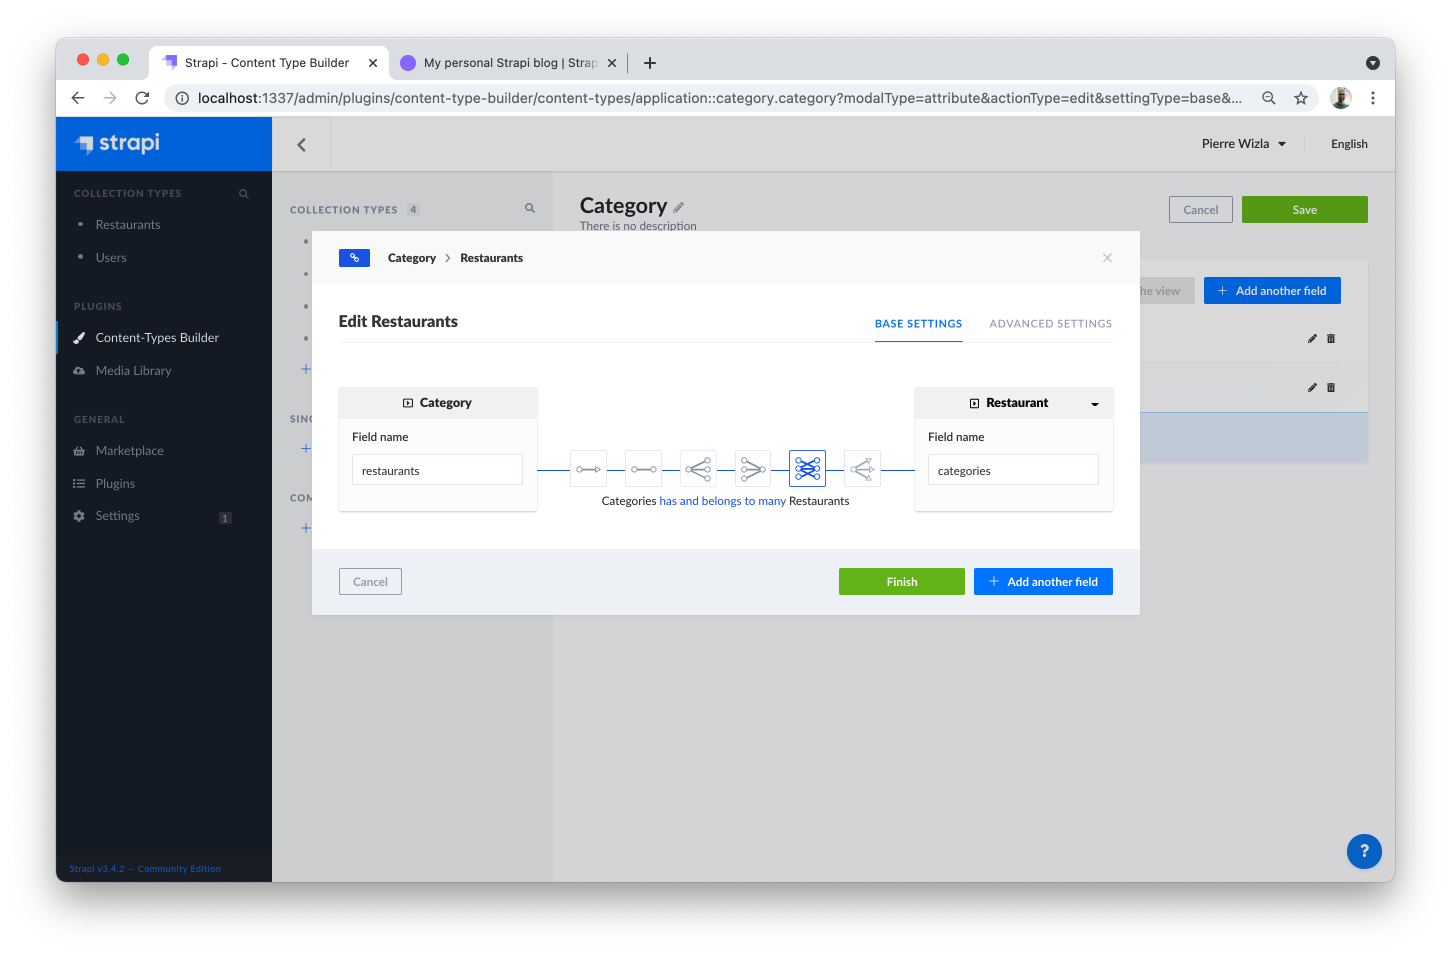
- On the right side, click the Category relational fields box and select "Restaurant".
- In the center, select the icon that represents "many-to-many"
. The text should read
Categories has and belongs to many Restaurants.
- Finally, click Finish, then the Save button, and wait for Strapi to restart.
# Step 2: Use the collection types to create new entries
Now that we have created a basic data structure with 2 collection types, "Restaurant" and "Category", let's use them to actually add content by creating new entries.
# Create an entry for the "Restaurant" collection type
- Go to Collection types > Restaurants (opens new window) in the main navigation.
- Click on Add New Restaurants.
- Type the name of your favorite local restaurant in the Name field. Let's say it's
Biscotte Restaurant. - In the Description field, write a few words about it. If you're lacking some inspiration, you can use
Welcome to Biscotte restaurant! Restaurant Biscotte offers a cuisine based on fresh, quality products, often local, organic when possible, and always produced by passionate producers. - Click Save.
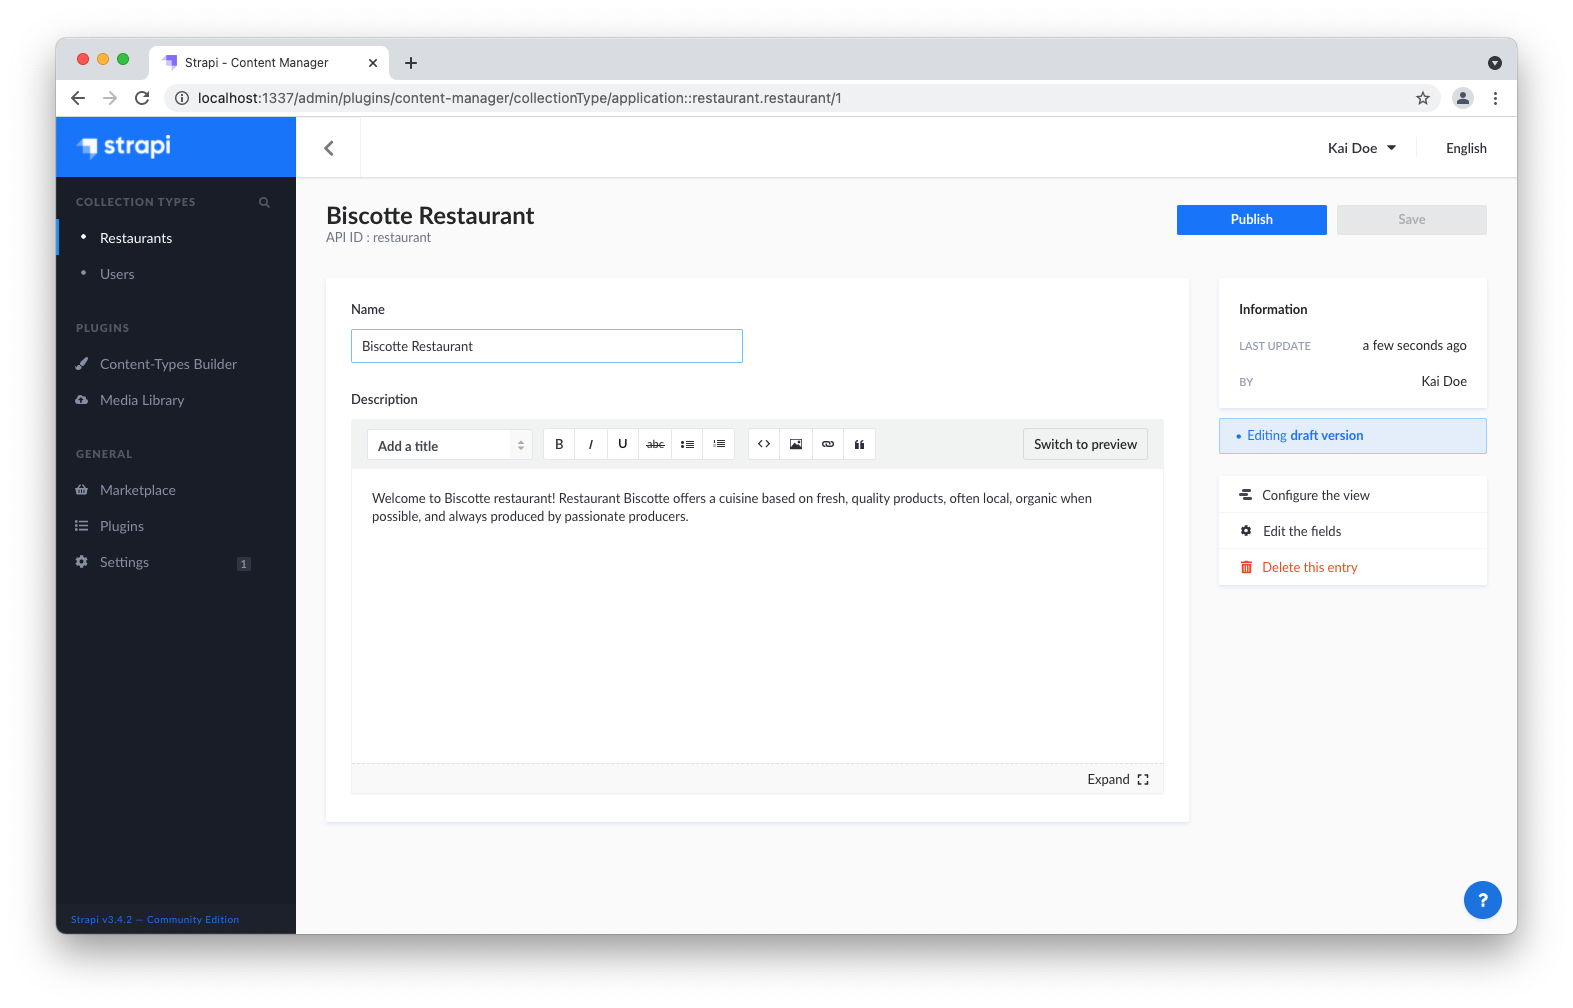
The restaurant is now listed in the Collection types > Restaurants (opens new window) view.
# Add Categories
Let's go to Collection types > Categories (opens new window) and create 2 categories:
- Click on Add New Categories.
- Type
French Foodin the Name field. - Click Save.
- Go back to Collection types > Categories, then click again on Add New Categories.
- Type
Brunchin the Name field, then click Save.

The "French Food" and "Brunch" categories are now listed in the Collection types > Categories (opens new window) view.
# Add a Category to a Restaurant
Go to Collection types > Restaurants (opens new window) in the main navigation, and click on "Biscotte Restaurant".
In the right sidebar, in the Categories drop-down list, select "Brunch". Click Save.
# Step 3: Set Roles & Permissions
We have just added a restaurant and 2 categories. We now have enough content to consume (pun intended). But first, we need to make sure that the content is publicly accessible through the API:
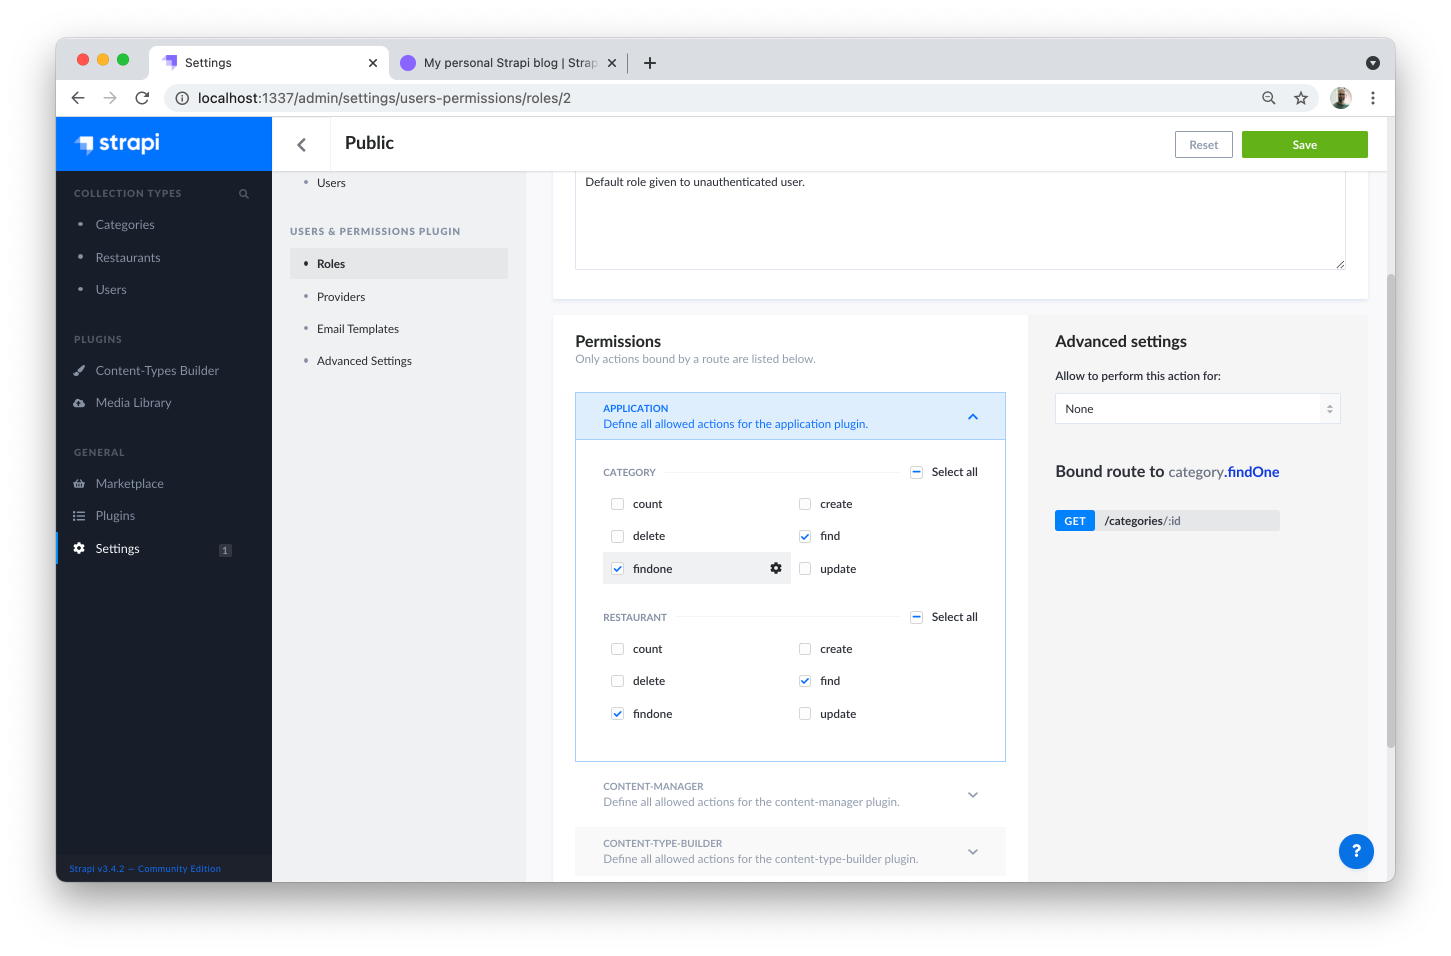
- Click on General > Settings at the bottom of the main navigation.
- Under Users & Permissions Plugin, choose Roles (opens new window).
- Click the Public role.
- Scroll down under Permissions.
- In the Application tab, find Restaurant.
- Click the checkboxes next to find and findone.
- Repeat with Category: click the checkboxes next to find and findone.
- Finally, click Save.
# Step 4: Publish the content
By default, any content you create is saved as a draft. Let's publish our categories and restaurant.
First, navigate to Collection types > Categories (opens new window). From there:
- Click the "Brunch" entry.
- On the next screen, click Publish.
- In the Please confirm window, click Yes, publish.
Then, go back to the Categories list and repeat for the "French food" category.
Finally, to publish your favorite restaurant, go to Collection types > Restaurants (opens new window), click the restaurant entry, and Publish it.

# Step 5: Use the API
OK dear gourmet, we have just finished creating our content and making it accessible through the API. You can give yourself a pat on the back вҖ” but you have yet to see the final result of your hard work.
There you are: the list of restaurants is accessible at http://localhost:1337/restaurants (opens new window).
Try it now! The result should be similar to the example response below рҹ‘Ү.
Click me to view an example of API response
[
  {
    "id":1,
    "name":"Biscotte Restaurant",
    "description":"Welcome to Biscotte restaurant! Restaurant Biscotte offers a cuisine based on fresh, quality products, often local, organic when possible, and always produced by passionate producers.",
    "published_at":"2021-05-27T15:46:43.097Z",
    "created_at":"2021-05-27T15:40:01.290Z",
    "updated_at":"2021-05-27T15:46:43.110Z",
    "categories":[
      {
        "id":1,
        "name":"French Food",
        "published_at":"2021-05-27T15:46:14.704Z",
        "created_at":"2021-05-27T15:41:59.725Z",
        "updated_at":"2021-05-27T15:46:14.725Z"
      },
      {
        "id":2,
        "name":"Brunch",
        "published_at":"2021-05-27T15:46:02.015Z",
        "created_at":"2021-05-27T15:42:29.201Z",
        "updated_at":"2021-05-27T15:46:02.035Z"
      }
    ]
  }
]
рҹҘі CONGRATULATIONS!
Now your content is created, published, and you have permissions to request it through the API. Keep on creating amazing content!
# вҸ© What to do next?
# Consume your API
You can learn how to consume your API with your favorite frameworks, front-end or back-end programming languages by choosing one in the list below.
# Deploy your project
The next step is to deploy both your Strapi back end and the front end on the platforms of your choice.
рҹ‘ү You can deploy the Strapi back end on various services: Amazon AWS, Microsoft Azure, DigitalOcean, Google App Engine, Heroku, and many more (see our Deployment guides).
# рҹҡҖ Part A: Create a new project with Strapi starters
Strapi starters (opens new window) are the fastest way to kickstart your project. They cover many use cases (blog, e-commerce solution, corporate website, portfolio) and integrate with various technologies (Gatsby, Gridsome, Next, Nuxt).
This quick start guide has been specifically tailored to use the Gatsby blog starter (opens new window). We highly recommend you to follow along with this starter. Once you get a better understanding of Strapi, you will be able to play with other starters on your own.
# Step 1: Run the installation script
To create a Gatsby (opens new window) blog using Strapi, run the following command in a terminal:
npx create-strapi-starter my-project gatsby-blog
yarn create strapi-starter my-project gatsby-blog
During the installation, when terminal asks Choose your installation type: select the default Quickstart (recommended) option by pressing Enter. The installation then resumes вҖ” just let the magic happen!
# Step 2: Register & have a look at your blog
Once the installation is complete, your browser automatically opens 2 tabs:
- The first tab (http://localhost:1337/admin/auth/register-admin (opens new window)) is the admin panel, it's for the back end of your application.
- The second tab (http://localhost:8000 (opens new window)) is for the front end of your application, and you can already see the Gatsby blog in action.
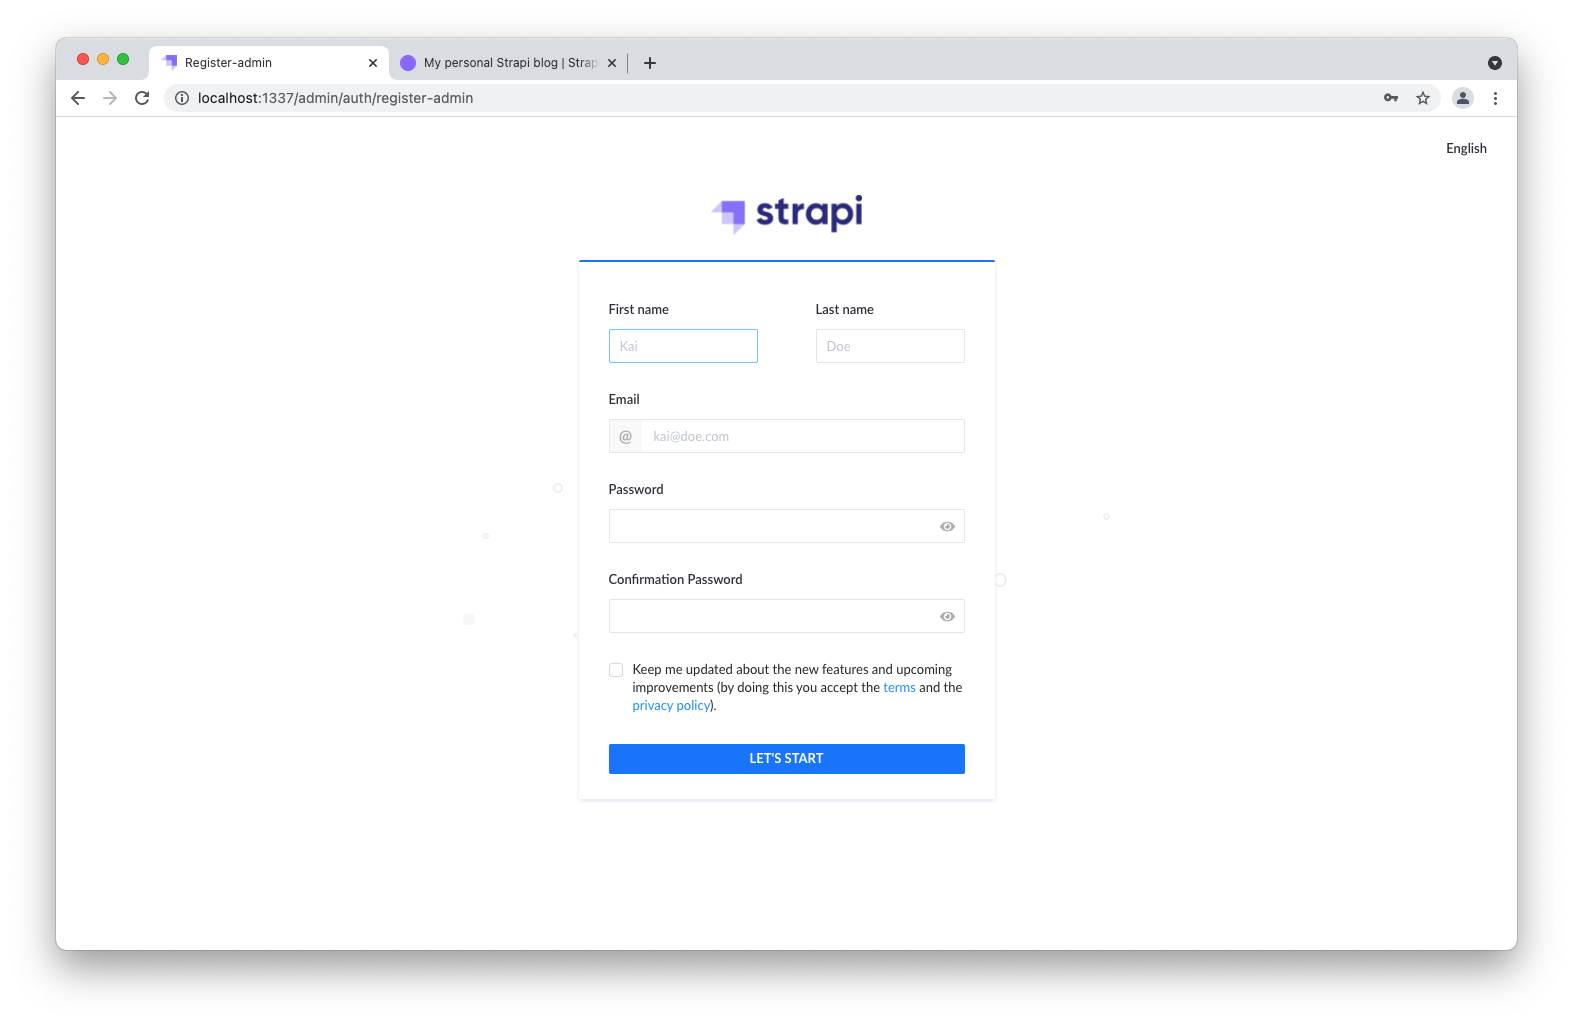
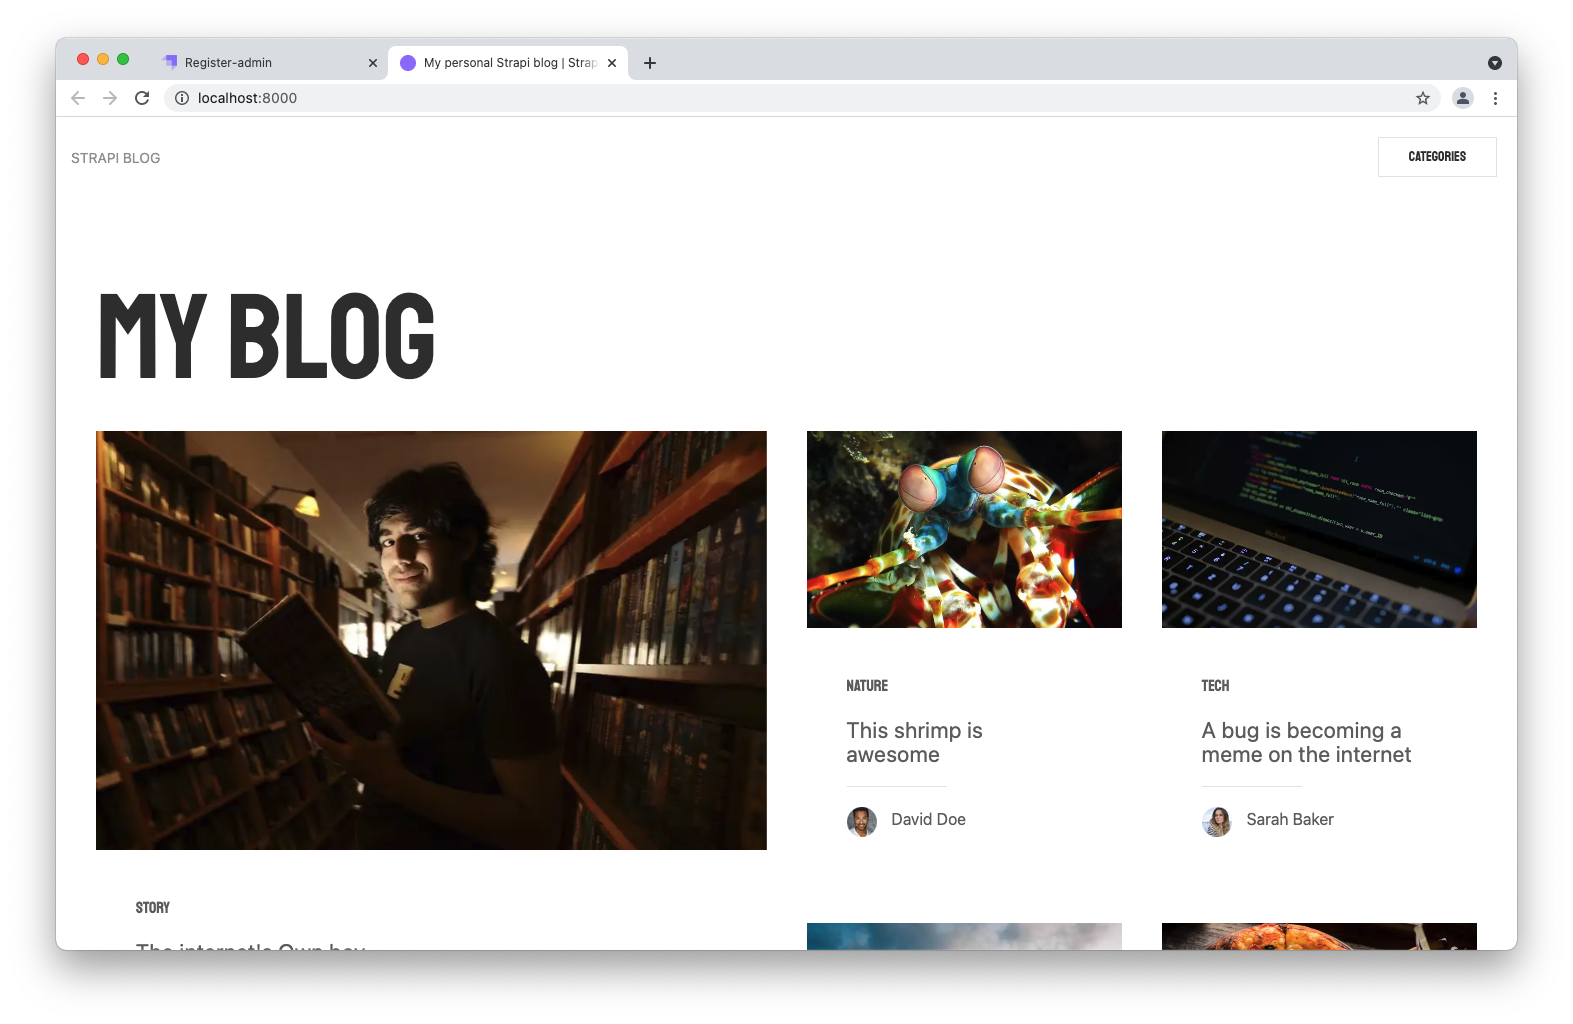
By completing the form in the first tab, you create your own account. Once done, you become the first administator user of this Strapi application. Welcome aboard, commander!
CONGRATULATIONS! рҹҘі
Your blog is ready! You can start playing with Strapi and discover the product by yourself using our User Guide, or proceed to part B below.
Writing a blog is not your cup of tea? You can leave this guide and play with other Starters (opens new window) on your own.
# рҹҺЁ Part B: Play with your content
Strapi starters (opens new window) build a full stack application and a data structure for you, so you can start playing with your content faster.
We are about to contribute to the blog we have just created. Let's play with your application, by adding yourself as a writer and creating your own article, updating the homepage, and restarting the servers to look at the final result.
рҹ’Ў TIP
If the Strapi server is not already running, in your terminal, cd into the my-project folder and run npm run develop (or yarn develop) to launch it.
# Step 1: Add yourself as a writer
You have several ideas for great articles in mind. But first, the world needs to know who you are!
Click on Collection types > Writers (opens new window) in the main navigation, and click the Add New Writers button.
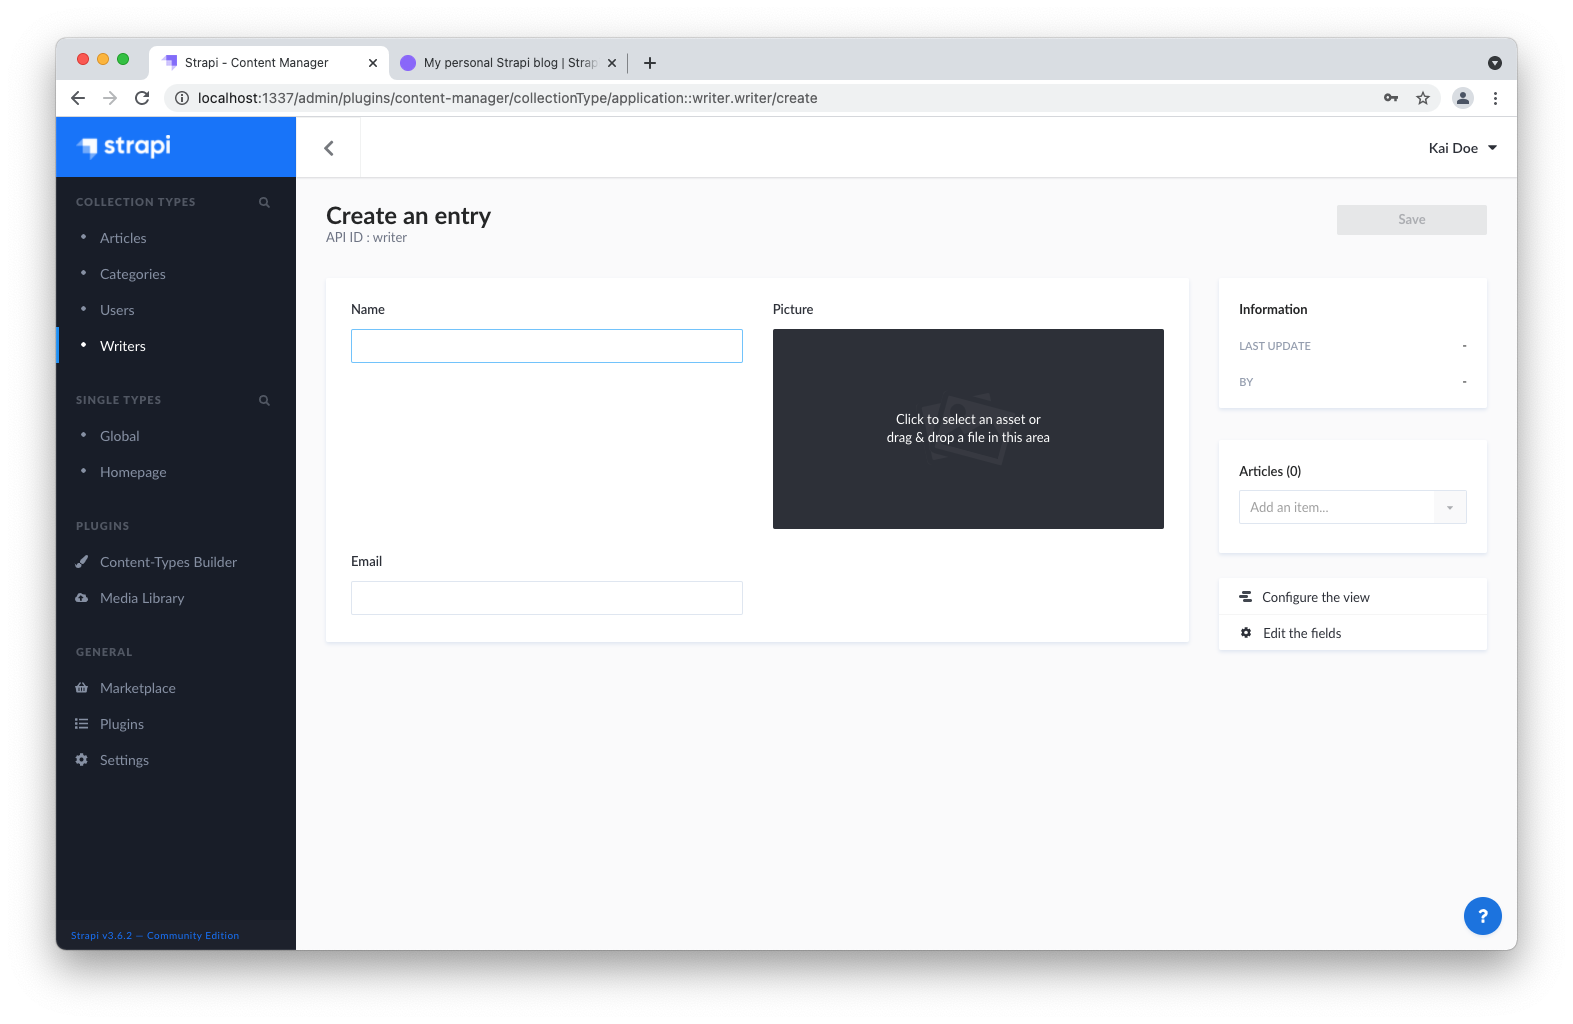
- Add your Name and Email in the corresponding fields.
- Add your favorite selfie in the Picture field. You can either drag and drop an image or click the field and upload a file. Saying 'Cheese!' during the process is optional. рҹҳ„
- Click Save.
# Step 2: Write & publish your first article
To write an article, we need to add a new entry to the "Articles" collection type and fill in a few fields.

Click on Collection types > Articles (opens new window) in the main navigation, and click the Add New Articles button.
# Give your article a title, a description, and add some content
- Type
Hello World!in the Title field. - Type
My very first article with Strapiin the Description field. - Write a few lines in the Content field. If you're lacking some inspiration, just type
This is my first blog article with Strapi and using it feels like a breeze!. - Scroll down and add a picture in the Image field.
# Choose an author and a category for your article
In the sidebar on the right, choose your name in the Author drop-down list. You have just signed your first article with Strapi. Take a few seconds to contemplate this historic moment!
While there, you might also want to choose a Category for your article from the list.
# Turn your draft into a publication
By default, your new article would be saved as a draft. Let's not be too shy and publish it right away.
To publish an article, click the Publish button at the top of the window.
You have just created and published your first article, "Hello World!". You can find it in the Collection types > Articles (opens new window) view.
# Step 3: Update the Homepage single type
It's time to make this blog a bit more yours.
Click on Single Types > Homepage (opens new window) in the main navigation. Let's edit this homepage:
- Replace the image in the ShareImage field.
- At the bottom of the page, update the Title to
My Wonderful Strapi Blogin the Hero field group. - Click Save.
# Step 4: Restart the servers to reflect latest changes
Gatsby is a static-site generator. It means that you need to restart the servers for changes to appear on the front end:
- In your terminal, press
Ctrl-Cto stop the servers. - Make sure you are in the
my-projectfolder. If not, typecd my-projectand press Enter. - Restart the servers by typing
npm run develop(oryarn develop) and press Enter.
After a few moments, you should see your blog with its updated title running at http://localhost:8000 (opens new window). The "Hello World!" article you have just created is also visible at the bottom of the page.

CONGRATULATIONS! рҹҘі
Now you know how to use Strapi to create and update your blog. Keep on creating amazing content!
# вҸ© What to do next?
The beauty of using Strapi starters (opens new window) is that the Strapi back end comes with a front end ready out-of-the-box. Now you probably want to show your shiny new website to the world! The next step is then to deploy both the Strapi back end and the front end on the platforms of your choice:
рҹ‘ү You can deploy the Strapi back end on various services: Amazon AWS, Microsoft Azure, DigitalOcean, Google App Engine, Heroku, and many more (see our Deployment guides).
рҹ‘ү Deploying the front end mostly depends on the technology it's based on. The easiest way to deploy your Gatsby blog front end is probably to deploy on Gatsby Cloud (opens new window).
рҹӨ“ To go further with starters
- Read more about the starters CLI (opens new window) on our blog.
- Start another project! We have lots of other Starters (opens new window) you can use to kickstart your blog, e-commerce, corporate website, or portfolio project.
