Android 单帧碎片
单帧碎片:单帧碎片是为小屏幕设备所设计的,如手持设备(移动电话),Android 3.0 以上版本支持。
实例
该实例解释如何创建自己的碎片。这里我们创建两个碎片,其中一个被使用在设备是横屏的时候,另一个被使用在设备是竖屏的时候。下面让我们按照步骤开始吧。
| 步骤 | 描述 |
|---|---|
| 1 | 使用 Android Studio IDE 来创建一个 Android 应用程序,命名为 Single Fragments,包名 cn.uprogrammer.singlefragments。 |
| 2 | 修改如下所示的主活动文件 MainActivity.java。这里我们将要检查设备的方向,并基于此切换不同的碎片。 |
| 3 | 在 cn.uprogrammer.singlefragments 包下创建 PortraitFragment.java 和 LandscapeFragment.java 两个文件,并关联方法。 |
| 4 | 创建布局文件 res/layout/landscape_fragment.xml 和 res/layout/portrait_fragment.xml 来定义两个碎片的布局。 |
| 5 | 修改 res/layout/activity_main.xml 来包含两个碎片。 |
| 6 | 在 res/values/strings.xml 中定义需要的常量。 |
| 7 | 启动Android模拟器来运行应用程序,并验证应用程序所做改变的结果。 |
下面是主要活动文件 src/cn.uprogrammer.singlefragments/MainActivity.java 的内容:
package cn.uprogrammer.singlefragment;

import android.os.Bundle;
import android.app.Activity;
import android.app.FragmentManager;
import android.app.FragmentTransaction;
import android.content.res.Configuration;

public class MainActivity extends Activity {

    @Override
    protected void onCreate(Bundle savedInstanceState) {
        super.onCreate(savedInstanceState);

        Configuration config = getResources().getConfiguration();

        FragmentManager fragmentManager = getFragmentManager();
        FragmentTransaction fragmentTransaction =
                fragmentManager.beginTransaction();

        /**
         * 检测设备方向,并做相应地操作。
         */
        if (config.orientation == Configuration.ORIENTATION_LANDSCAPE) {
            /**
             * 设备的横屏模式。
             */
            LandscapeFragment ls_fragment = new LandscapeFragment();
            fragmentTransaction.replace(android.R.id.content, ls_fragment);
        }else{
            /**
             * 设备的竖屏模式。
             */
            PortraitFragment pm_fragment = new PortraitFragment();
            fragmentTransaction.replace(android.R.id.content, pm_fragment);
        }
        fragmentTransaction.commit();
    }
}
在包 cn.uprogrammer.singlefragments 下创建两个碎片文件 LandscapeFragment.java 和 PortraitFragment.java。
以下是 LandscapeFragment.java 文件的内容:
package cn.uprogrammer.singlefragment;

import android.app.Fragment;
import android.os.Bundle;
import android.view.LayoutInflater;
import android.view.View;
import android.view.ViewGroup;


public class LandscapeFragment extends Fragment {

    @Override
    public View onCreateView(LayoutInflater inflater,
                             ViewGroup container, Bundle savedInstanceState) {
        /**
         * Inflate the layout for this fragment
         */
        return inflater.inflate(
                R.layout.landscape_fragment, container, false);
    }

}
以下是 PortraitFragment.java 文件的内容:
package cn.uprogrammer.singlefragment;

import android.app.Fragment;
import android.os.Bundle;
import android.view.LayoutInflater;
import android.view.View;
import android.view.ViewGroup;

public class PortraitFragment extends Fragment {

    @Override
    public View onCreateView(LayoutInflater inflater,
                             ViewGroup container, Bundle savedInstanceState) {
        /**
         * Inflate the layout for this fragment
         */
        return inflater.inflate(
                R.layout.portrait_fragment, container, false);
    }
}
在目录 res/layout 目录下创建2个布局文件 landscape_fragment.xml 和 portrait_fragment.xml。
以下是 landscape_fragment.xml 文件的内容:
<?xml version="1.0" encoding="utf-8"?>
<LinearLayout
    xmlns:android="http://schemas.android.com/apk/res/android"
    android:orientation="vertical"
    android:layout_width="fill_parent"
    android:layout_height="fill_parent"
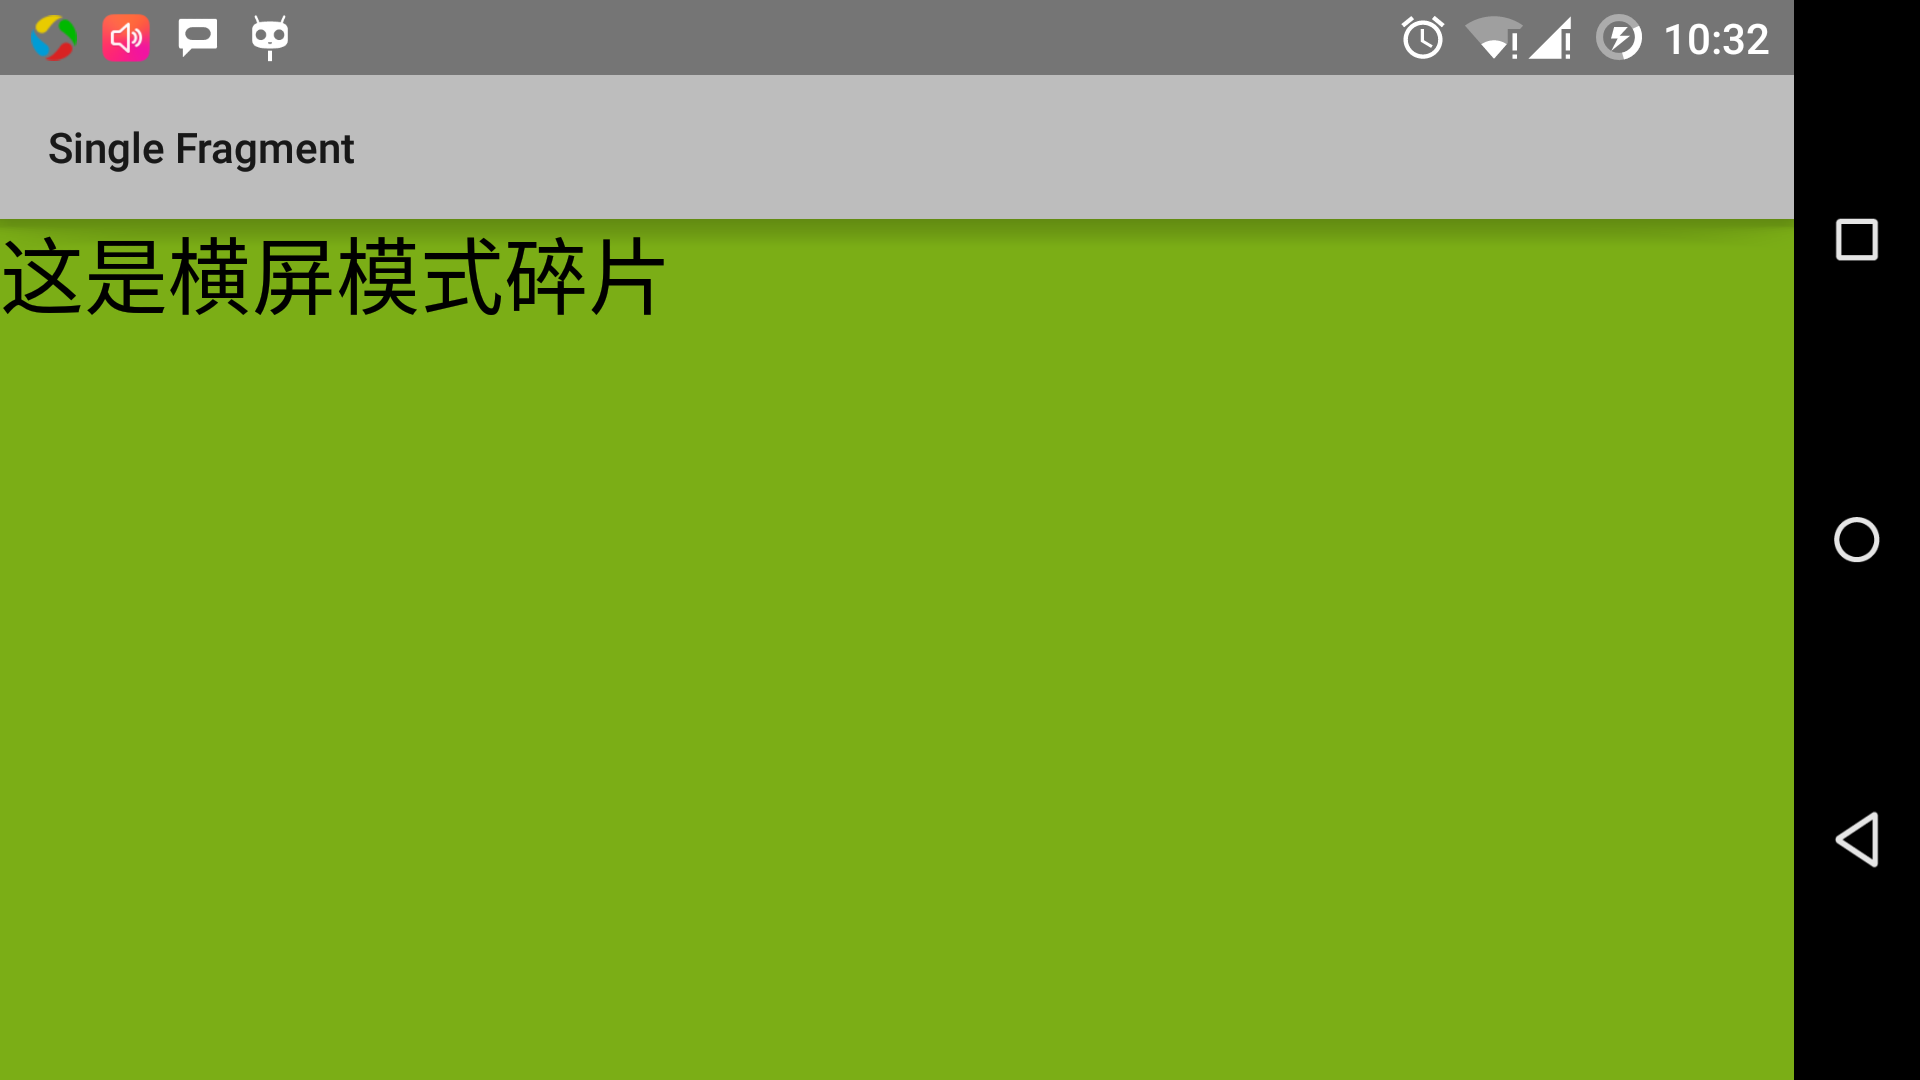
    android:background="#7bae16">

    <TextView
        android:layout_width="fill_parent"
        android:layout_height="wrap_content"
        android:text="@string/landscape_message"
        android:textColor="#000000"
        android:textSize="28sp" />

    <!-- More GUI components go here  -->

</LinearLayout>
以下是 portrait_fragment.xml 文件的内容:
<?xml version="1.0" encoding="utf-8"?>
<LinearLayout
    xmlns:android="http://schemas.android.com/apk/res/android"
    android:orientation="horizontal"
    android:layout_width="fill_parent"
    android:layout_height="fill_parent"
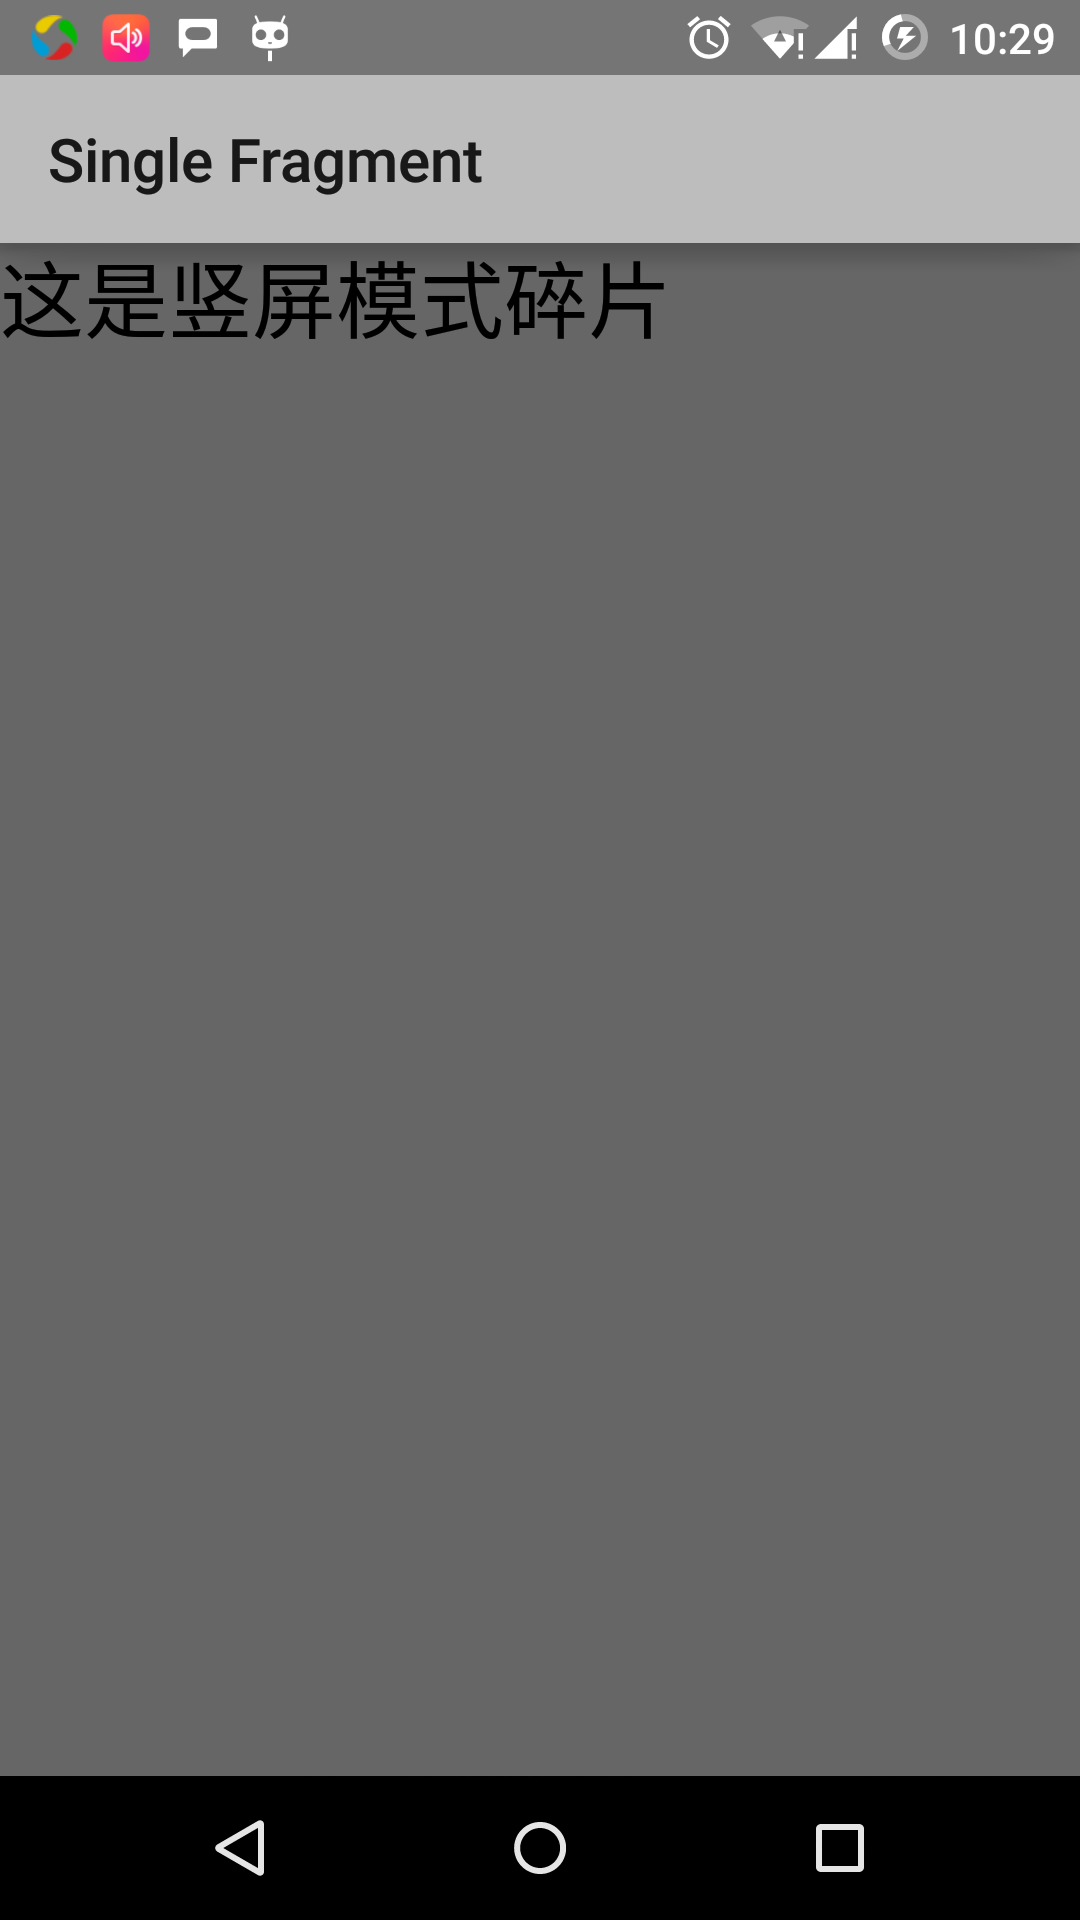
    android:background="#666666">

    <TextView
        android:layout_width="fill_parent"
        android:layout_height="wrap_content"
        android:text="@string/portrait_message"
        android:textColor="#000000"
        android:textSize="28sp" />

    <!-- More GUI components go here  -->

</LinearLayout>
以下是 res/layout/activity_main.xml 文件的内容,其中包含两个碎片:
<?xml version="1.0" encoding="utf-8"?>
<LinearLayout xmlns:android="http://schemas.android.com/apk/res/android"
    xmlns:tools="http://schemas.android.com/tools"
    android:layout_width="fill_parent"
    android:layout_height="fill_parent"
    android:orientation="horizontal">

    <fragment
        android:id="@+id/landscape_fragment"
        android:layout_weight="1"
        android:layout_width="0dp"
        android:layout_height="match_parent" />

    <fragment
        android:id="@+id/portrait_fragment"
        android:layout_weight="2"
        android:layout_width="0dp"
        android:layout_height="match_parent" />

</LinearLayout>
确保 res/values/strings.xml 文件包含如下内容:
<?xml version="1.0" encoding="utf-8"?>
<resources>

    <string name="app_name">Single Fragment</string>
    <string name="hello_world">Hello world!</string>
    <string name="action_settings">Settings</string>
    <string name="landscape_message">这是横屏模式碎片</string>
    <string name="portrait_message">这是竖屏模式碎片</string>
</resources>
让我们运行刚刚修改的 Single Fragments 应用程序。我假设你已经在安装环境时创建了 AVD。打开你的项目中的活动文件,点击工具栏中的 图标来在 Android Studio 中运行应用程序。Android Studio 在 AVD 上安装应用程序并启动它。如果一切顺利,将在模拟器窗口上显示如下:

按照下列操作来改变模拟器屏幕的方向模式:
- fn+control+F11 在mac上改变横屏为竖屏,反之亦然
- ctrl+F11 在windows上
- ctrl+F11 在Linux上
当你修改模式,你将看到适用于横屏模式的页面实现:

通过这种方法,你可以在同一个活动中通过使用不用的碎片来实现不同的界面。可以按照你的需求使用不同类型的界面组件来构建界面。


点我分享笔记